Pie Crust 101
This topic is even scary for me. I've made ONE pie in my entire life. By that I mean an apple pie with
dough from scratch that I rolled by hand and topped with a fancy-shamcy lattice crust. I used Martha's recipe and it tasted great. It just looked horrid.
See I have this weird habit of not trusting recipes, maybe I mentioned this before. Not because I think 'oh I have a baking blog I know everything' oh no, not at all. I just think, there must be a type-o here, how could it be that this pie recipe calls for 3 pounds of chopped apples? That is way too much, I will only use one pound. This is why I am writing a blog about LEARNING how to bake. All those apples SHRINK while baking, so it may go into the oven looking like 3 pounds, but it certainly doesn't come out looking that way.
When I stacked all those apples into the pie crust it was an apple mountain. I took more than half out, cursing the person who edited the cookbook. Alas, it came out of the oven looking pitiful, shriveled, and defeated. My lattice shrunk and sank. The juice from the apples absorbed into the top crust and became soggy. Talk about heartbreaking.
Last year Martha Stewart came out with a new cookbook entitled 'Martha Stewart's Pies & Tarts.' The pictures are remarkable and the pies seem so friendly and perky, like they're saying 'bake me'. I've owned this damn cookbook for almost a year and I've been too terrified to try and bake from it. I haven't had the guts to re-roll and try again; defeat is not an emotion I take lightly. Well, today we'll overcome our fear of pie. I'll go first and as before, I'll tell you what NOT to do. Oh, and let's follow the recipe this time.
I had a good laugh while reading the forward written by our fearless leader Martha herself. Here are her words to empower us all: 'Pies (and tarts) remain among America's favorite desserts, and to bake a delectable example of either is something every home baker should be able to do.' Yes ma'am.
How to bake a perfect pie every time
Quality ingredients, correct temperature (of the dough), and proper technique. These three components should guarantee you a delectable pie. Well, at least something edible anyway. Don't worry so much about how it looks the first time around. If your crusts edges are a bit crooked or not fluted to perfection it's OK…let's get the technique down before we enter our pies into a beauty pageant.
Quality Ingredients
A typical pie crust recipe usually only contains about 5 ingredients (butter, flour, sugar, salt, and water). Since we're not working with too many components here, let's make these few items count.
Butter:
I can never stress this point enough, when it comes to butter, choose quality over 'double-coupon day margarine'. Select a brand of butter with a high percentage of fat. 82 or 83% is ideal. Butter with a higher fat content means it will have less water and in turn will provide a flakier, more crispy, buttery, fatty, oh-that's-good crust.
People often ask me which brand of butter I opt for and the answer is easy and always the same:
You cannot beat the taste, consistency, or quality of President. Also, it has 82% fat which is what we're looking for, especially with regards to pastry dough:
Flour:
Always use all-purpose flour (unless otherwise indicated in your recipe). Flour acts as the structure in your dough and when prepared correctly will produce a crust that is tender and not too crumbly.
Salt:
Salt? Yes, salt. If you're a veteran baker you'll know almost any cookie, cake, brownie, or pie recipe typically always calls for salt. However when salt is added to a sweet dish (compared to a savory one) it's purpose is not to make the taste 'salty' as it would in say french fries. Because such a small amount is added it will never be tasted as 'salt'. It will merely improve and enhance the flavors.
Sugar:
Some pie dough recipes will call for sugar, others won't. Really it’s a matter of preference. I've noticed as I've been researching different recipes some call for powdered sugar, which is new to me. Most traditional recipes always specify granulated. So what's the difference? As far as I can sort out, some people prefer using powdered sugar due to its finer texture as compared to granulated. Granulated sugar (in large amounts) can cause your dough to become sticky and fussy to work with. Another fact I was unaware of is some brands of powdered sugar contain cornstarch (to help prevent clumping). Due to this addition, you cannot easily swap out powdered sugar for granulated in a recipe. The proportions are not equal and you could ultimately disrupt the delicate balance of moisture/fat/flour in your dough . See pie dough is MOODY and sensitive. I would recommend if your recipes calls for granulated, use granulated. Stick with what works.
Water:
Well that seems easy enough doesn’t it. Wrong again. You need your water damn cold. This element is crucial for your pie dough. If you add room temperature water to your dough you could ever so slightly warm up the butter, which is exactly what we're trying NOT to do. You need the butter cold at all time, even cold going into the oven.
Dough Temperature
When it comes to preparing pie dough, always remember the colder the better. Everything from the ingredients, your hands, the counter, to your bowls…all should resemble 'brrr.'
Before you even get started on combing the dough, mix up your flour, salt, and sugar. Place this bowl in the fridge for at least 30 minutes. I know, who knew. As for your butter, cut it up into small bite size chunks (butter should be COLD from the fridge at this point, don't let it sit out on the counter BY ANY MEANS!). Take the cubes of butter and place them back in the fridge. Let the flour mixture and butter firm up and only then can we get a mixin'.
Once you've prepared your dough, place it back into the fridge for NO less than 1 hour. Overnight is best…unless you're impatient like me then stick in the freezer till it's quite firm and you can squeeze it just slightly.
Technique
The technique I am going to show you is used to prepare a Pate Brisee dough. Ooh la-la. English translation: short crust pastry dough. Further translation, a short crust pastry is one that can be used for either sweet or savory pies and tarts. If you are making this dough for a savory pie, you can omit the sugar. A short crust recipe is not the same as puff pastry dough since your short crust recipe doesn't include any leavening agents like baking powder or soda (and thus will not rise). But who needs lift when you've got that flaky crust?
Pate Brise (Short Crust Pastry Dough)
from Martha Stewart
Ingredients:
2 1/2 cups all-purpose flour
1 teaspoon salt
1 teaspoon sugar
1 cup (2 sticks/8 ounces/225 grams) cold unsalted butter, cut into small chunks
1/4 to 1/2 cup ice water
Since butter here in Dubai is sold in grams (and for that matter every other flippin place in the world except the US) we need to first weigh it to get ourselves 8 ounces. If you're in the US just go get yourself 2 sticks of butter...you lucky ducky.
Next, chop up the butter into small pieces. Make sure it's straight out of the fridge before you do so, otherwise you'll have a mess on your hands.
Mix together the flour, salt, and sugar. Don't forget to sift. Place bowl in fridge for at least 30 minutes. Everything has to be cold, yep even the dry.
In the meantime, pour your water into a measuring cup (you'll need this so it will be easier to pour into the food processor). Add ice and place in fridge. You need your water to be ice cold, not room temperature with some ice. I know, I know...but trust me it makes all the difference.
Once your dry ingredients have had a chance to chill, add to the food processor and pulse for about ten seconds. This gets all the particles nice and smooth.
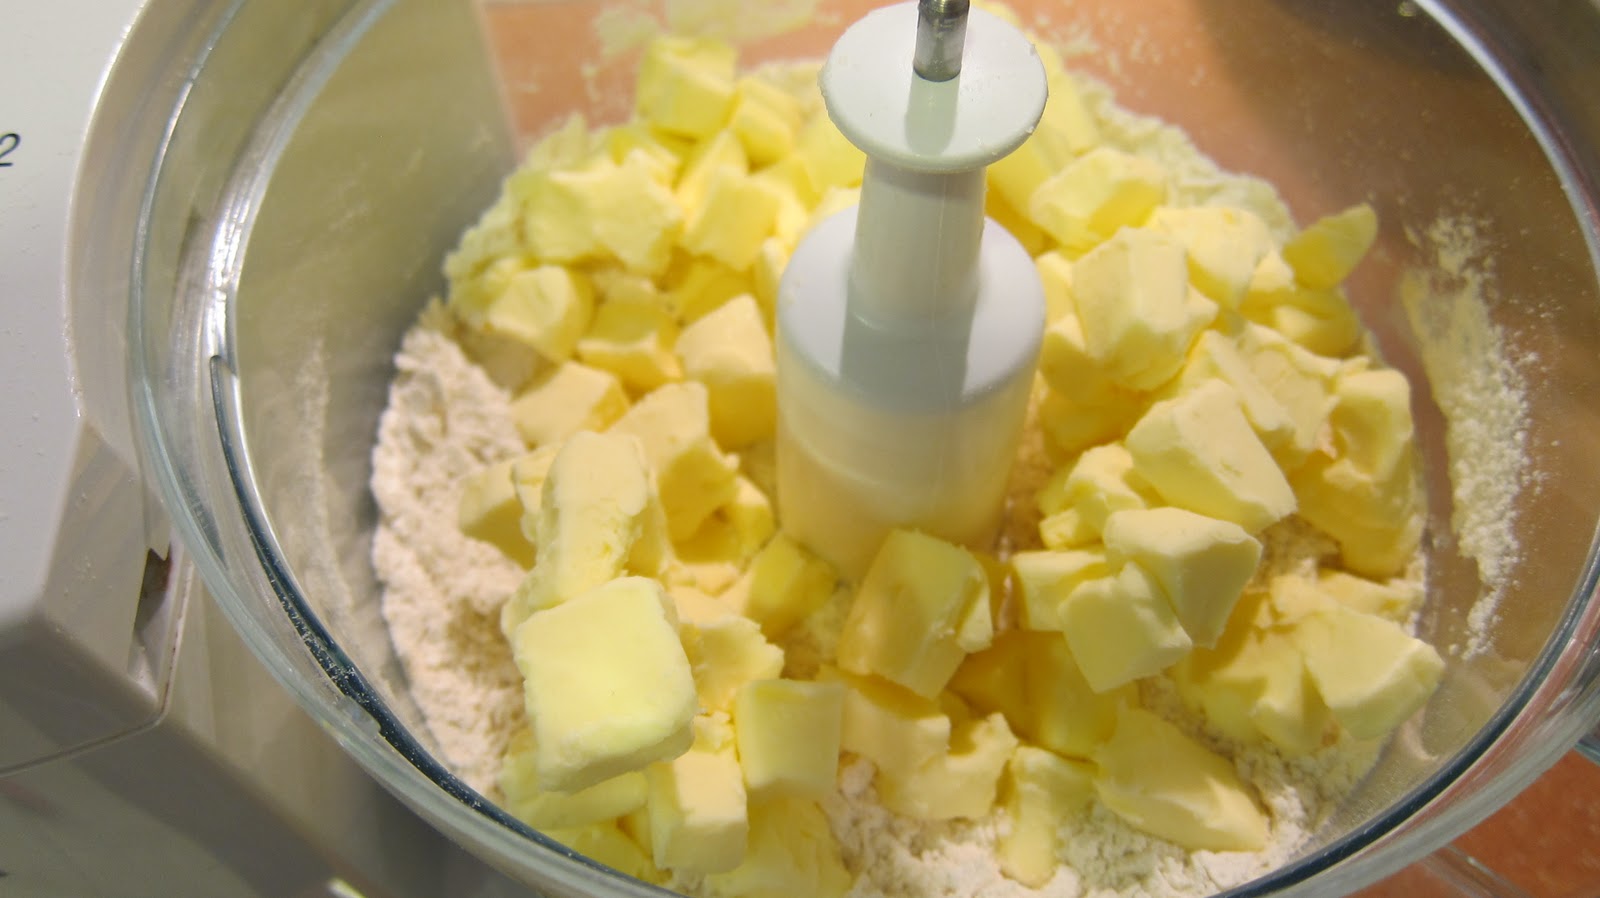
Add your chopped butter.
Pulse until the mixture resembles coarse meal, about ten seconds. You should still see some larger pieces.
Next, slowly drizzle your ice water (starting with only 1/4 cup, adding more if necessary) and pulse until your dough just begins to come together. Try pinching a piece; it should not be wet or sticky. Add up to a 1/4 cup more water if necessary, one tablespoon at a time.
Place the dough mixture (yes it will be crumbly like this, only due to the cold water and butter) onto a piece of plastic wrap. Quickly shape the dough into two equal balls.
I weighed the two balls of dough so I'd have exactly an equal amount for the top and bottom crust. You don't need to be a fanatic like this, eye-balling is okay. I just like using my new fancy scale from Santa. But it is nice to know you've got two equal amounts. Mine can out to be approximately 12.3 ounces.
Wrap the two balls of dough separately in plastic warp and place in the fridge for at least one hour to firm up.
Once your dough has chilled, remove the plastic and place onto a lightly dusted counter. Be sure to also dust your rolling pin. Think less is more here. You can always add more flour if need be. Adding too much flour can cause the dough to become tough. If you find you're having trouble working the dough, allow it to sit at room temperature for 10 minutes.
Carefully roll the dough, starting from center working toward the edge. Rotate dough every few rolls by 1/8 of a turn. This helps keep the round shape.
Next, make sure your pie dish is close by. Slowly turn your dough onto the rolling pin. This will help you pick it up and place onto the dish.
Okay here it can be tricky. Make sure the dough is evenly centered. You don't want to have to pick it up and shift it over. It ain't easy.
Once you've got the dough in the dish, press it into the edges and make sure its somewhat consistent. Cover your dish with plastic wrap and place in the fridge so the dough chills back up, yet again. Take a breath, we're half-way there.
Preparing the filling:
The filling recipe is adapted from my new favorite cookbook 'Baked. New Frontiers in Baking.'
Baked,
a bakery located in Brooklyn was founded in 2005 by two friends Matt Lewis and Renato Poliafito. These guys know, understand, and appreciate 'Americana' baking. Every single recipe is something I would love to share with you. To read more about Baked, please visit their website
here. If you live near Brooklyn, go pay their shop a visit. I can guarantee they will not disappoint. If you can't make it out, please pick up their
cookbook...I'd love to test all their recipes but damn then I'd give it all away for free. Gotta show these boys some love.
Gentleman's Apple Pie (because of the whiskey, tee-hee-hee)
*Please note for the pie I prepared here, I used Martha Stewart's Pate Brise recipe for the dough, only because I made it before and it was a total flop and I wanted to give it another crack. I am sure the recipe from Baked is equally as awesome. For the original 'Classic Apple Pie' recipe from Baked, refer to page 93 from the cookbook above.
Ingredients:
Pate Brise, prepared as shown above
1/2 teaspoon cornstarch
1 cup firmly packed brown sugar
7 medium granny smith apples
3 tablespoons butter
2 teaspoons vanilla extract
1 teaspoon whiskey
1 teaspoon cinnamon
1 large egg, beaten
1 tablespoon raw sugar
First, give your apples a good wash and scrub. I thought the apples I bought weren't quite large enough so I added one red gala I had hanging out in the fridge.
I know you know how to peel apples. But, I found a way to make it less irritating. First, peel around the top of the apple as shown here in the red gala.
Then do the same to the bottom of the apple.
This allows you to make quick straight peels up and down, getting that apple naked in no time.
Unfortunately I don't have an apple corer, and only this monster apple slicer, but it does the job. Core all the apples.
On a side note, if you wonder what I do with my son while I'm baking I let him roam the kitchen causing a disaster. Sometimes he likes to eat his socks. As long as he's not grabbing knives I'm cool with that.
Okay, where were we? Yep, core all those flippin apples.
Then slice each apple segment in half. No more. You need your apples about 1/4" thick.
In a small bowl, mix together the cornstarch and brown sugar.
Using a heavy skillet, melt the butter. Swirl the butter around in your pan until it becomes brown. This took longer than I thought so be patient. Maybe 10 minute or so. But don't do this on a super-high heat, otherwise it will burn. Low and Slow is the Way to Go.
Once the butter has browned, add HALF the apples and saute on low heat until the apples are soft and tender. Also takes about 10 minutes. Once the apples are cooked, add the remaining chopped apples and the brown sugar/cornstarch. Cook until the sugar has melted.
And looks sinful like this.
Break out the Jack it's booze time. Add the vanilla, whiskey, and cinnamon to the saucepan and cook for about 5 minutes until the juices are thick and bubbly. Don't over-cook this part. I have to say the filling was still very thin at this point and I had to add an additional 3 teaspoons of cornstarch to thicken it back up. If this happens to you, add cornstarch 1 teaspoon at a time until you've reached the desired consistency. This may have been due to the fact that my apples weren't very big. I think I could have probably even added two more.
Remove the apple mixture from the heat and set aside. Next we'll get started on that top dough. Remove you pie dish out of the fridge and keep in close by. You don't want to be carrying rolled dough all over the kitchen. Make life easy for yourself. Roll out your dough in the same manner as before, starting from center to edge, rotating 1/8 a turn after every couple of rolls.
Next, pour the apple mixture into the pie dish. Roll the dough onto the rolling pin.
Carefully fit the dough into the edges and try to make it look clean and pretty. You can see here mine is a little crooked but its OK. You won't even notice once it's baked.
Take a sharp kitchen knife and cut some slits into the top of the pie, cutting all the way through the dough. You need these air vents to release steam that's created by the apples. Otherwise you could have an explosion. And you know who's going to get stuck cleaning up that mess. Additionally, if you have some sweet little cookie cutters you could also cut shapes into the dough. The possibilities here are endless. Here is a quick little
video to get the idea. Warning: these women are ding-bats but it's alright, so am I.
Before we can put this baby into the oven, we need to give it an egg wash. Break an egg in a small bowl and give it a good whisk. Using a pastry brush, give the top of your pie a good wash. This helps the crust come out of the oven looks shinny, beautiful, and oh-so tempting. Lastly, sprinkle the raw sugar on top of the egg wash. The raw sugar gives the crust a nice crunch and looks pretty fab too.
This is another Martha tip and a damn good one too. Place your pie onto a sheet pan in the event any of the juices from the pie seep out. This makes for easy clean up. I added a piece of waxed paper as well since cleaning pans is no fun.
Bake at 375 F. for 1 hour, or until the crust is brown and gorgeous and the juices are bubbly. Let cool on a wire rack for about an hour. I know it's hard but you must let the pie relax and cool down, trust me it's much easier to slice this way.
ENJOY!!!