Sep 1, 2014


Appologies for not posting any new recipes in over a month (I wish I could say I'm dieting but that will never happen.  Sugar and butter take up way too much of my food pyramid) but I've been working on a very exciting new project.

If you live in Dubai, get ready...I'm coming to your door.  Well, sort of.  I've started an online bakeshop via Instagram (@whipped_dubai) and will be selling various desserts at the Arte markets every month under the brand, Whipped.

As much as I adore baking & blogging, a girl needs an income too.  So, I thought, let's see if there is a market out there for my creations.  I'm going to initially focus on Americana desserts.  Goodies that are hard to come by here in the UAE (whoopie pies, anyone?)

Why the name Whipped?  Funny enough when I first started blogging, I never-ever in my sweet life made home made whipped cream.  Sorry, I'm American and we Cool-Whip-It.  It's easy, cheap, and damn good eaten frozen from the tub.  But honestly, I never knew any better.  It's just what we use.  So when I began experimenting and teaching myself new techniques (like fresh whipped cream) I was in awe of that fluff.  I put it on everything...take a look at my pies and tarts section.  You'll never see a naked pie in my kitchen.  Eva. 

And it's such a wonderful blank canvas!  I've created so many versions, from my lemoncello whip, to the hot chocolate, Bailey's, caramel, you name it, I fluffed it.  So hence the name Whipped.  From where my infatuation of home made desserts started.

Ready to have a taste of Whipped?  Be sure to check out my Instagram page (@Whipped_Dubai) for weekly specials and in the coming weeks I'll have the Facebook page active to purchase from too.  But more than anything I'd love to see you in person and have a chat about sugar.  Come see me at the Arte Market September 12th at Times Square in Dubai.   For more information on the Arte markets click here.


When Love Doughnuts asked me to do a review and taste test (as in to determine the flavors without knowing what I was eating) I was all in. Who would ever say no to that? Maybe someone with a waistline..but not me.

I started following Love Doughnuts on Instagram because of their daily posts.  Basically doughnut porn.  I think part of the lure for me is they are located in Abu Dhabi and not in close proximity to my mouth.  So you know, distance makes the heart (and stomach) grow fonder.

But in all honestly and hunger aside.  Love Doughnuts are onto something.  Their flavors are innovative and playful, something any good dessert should be.  They're producing a product that has a niche market and doing something truly unique.  The doughnut is timeless.  I took that from Homer by the way...no not THE Greek poet, Homer


I'm talking about Homer Simpson, doughnut aficionado...and this idea of a timeless, endearing 'Love' for the doughnut will always work to their advantage. 


And can we talk about their packaging for a minute?

 
Each individual flavor has it's own compartment, all stacked in a tower of caloric deep-fried heaven.  I took one look at this and thought, I would pay just as much for this beautiful box as I would the contents.   In a country where taste and statement is everything to many, Love Doughnuts nailed it.  If this box had a strap I might just wear it as a purse.  A doughnut purse.  That's all my love handles need.
 
So let's get to the flavors.  I was asked to first guess what I was eating before they let me in on the names.  Here's a line up of what was sent, and what I guessed:

My guess: White Chocolate with Chocolate Flake
Actual Flavor: White Belgium Chocolate
 

My guess: Strawberry Cheesecake
Actual Flavor: Obvi, Strawberry Cheesecake!
 

My guess: Caramel Apple
Actual Flavor: Toffee Apple Snickers


My guess: Lime and Passion fruit with White Chocolate Glaze
Actual Flavor: White Chocolate Pistachio with Lemon Passion fruit 
 
 
My guess: Triple Chocolate
Actual Flavor: Chocolate Neapolitan
 
If you're living in Abu Dhabi, lucky you!  You're only a quick car ride away from a visit to Love Doughnuts.  Well worth it I assure you.  You can find them in the Guardian Towers, Technip Building, Muroor Abu Dhabi.  
 
Instagram @love_dougnuts or www.lovedoughnuts.com


Jul 6, 2014

Kiwi, Fig, & Walnut Jam with Honey Mascarpone


When Zespri asked if I wanted another shipment of kiwi's this year, I couldn't have said oh-my-God-yes-please-now-hurry-I've-been-waiting-8-months-to-see-them-back-in-the-stores-can't-you-grow-them-quicker any faster. You may remember I took part in the Zespri Challenge last year.  I had to eat two kiwi's a day for two weeks and blog about my experience as well as share recipes of how I was able to incorporate them into my diet. It was heaven.   Especially considering I was pregnant and living off spicy Indian takeout and IHOP.  
 
And I'll be honest, kiwi's aren't the easiest fruit to bake with.  Sure you can slice them up over a tart and voile, dessert is served, but I strive to be innovative.  There are a million and one fruit tart recipes out there; and you're not here for that.  Here's what I came up with last year:


Although Zespri isn't holding the challenge again this year, I'm still happy to spread the word about how nutrient dense kiwi's are.  It's always a gift from the Gods when something is this sweet and delicious, but also so incredibly good for you too.
  • One Zespri Kiwi can provide you with your daily requirement of Vitamin C, helping contribute to the normal function of the immune system.
  • Zespri Kiwi's are an excellent source of fiber, potassium, and folate (kiwi's are one of the few foods that actually contain folate)
  • Eating two Zespri kiwis (I just did by the way I couldn't stand it, they're just so juicy and sweet.  I literally ate kiwis instead of a cookie...I girl-scout swear) has shown to reduce the amount of oxidative damage to the cells of the body and improve the repair of damaged DNA caused by free radicals and oxidative stress.  I wonder how it works on wrinkles?  Forget eye cream, I'm switchin' to Zespri!   

 
So, you may be wondering, what the heck, fig and kiwi? Let me explain...
 
My mother-in-law sends us army sized portions of Fig Jam (home-made with Lebanese figs only) whenever figs are in season.  It's a very typical Lebanese spread because they grow everywhere.  Lebanese figs must be like the American version of squash, tomatoes, or peaches.  When they grow...they grow...in abundance.  I'm talking like Costco-quantity-what-the-heck-am-I-going-to-do-with-20-pounds-of-figs.  And although my MIL and I may not speak the same language, there is one thing that we do understand, and that is I love fig jam and she wants as many photos of her grandkids that I'm able to send.  So, we happily swap.

I almost felt bad straying from the traditional Lebanese recipe for fig jam, but then again Pastry School Diaries is all about putting a modern twist on the classics, so fig and kiwi it is.

Have you tried SunGold's yet?  Let me tell you they're unlike any fruit you've ever tasted.  First, they're more yellowish and not quite as green as traditional kiwis:


SunGold's are somewhat less tart than a green kiwi and have a mild tropical/pineapple flavor.  The flesh of the fruit is extremely soft and waaaaaay more juicy than a regular green.  The skin is also thinner and very easy to peel.  Seriously it can do wrong. 

Kiwi, Fig, & Walnut Jam with Honey Mascarpone
makes about two cups of jam

*apologizes to my US readers, this recipe is in metric.  The original recipe I adapted was written in grams/ml.  But hey, it's fun to measure with a scale sometimes...recipes are sooooo much more accurate this way...us and our silly cups. 

Ingredients:
200 grams dried figs, sliced into strips (discard the stems)
250 ml water
75 grams sugar
6 SunGold Zespri Kiwis, peeled and cut into chunks
120 grams walnuts, toasted
20 grams sesame seeds

mascarpone for spreading
honey for drizzling
toasted baguette

Directions:

*If you have a kiwi spoon like the one seen here, scoop out the flesh of the kiwi over a bowl to catch the juice (which will be used in addition to the kiwi).  If you don't have a magical kiwi spoon don't fret; cut your kiwi's in half and use a small spoon, slipping it between the fruit and skin.  Slowly work your way around the perimeter to release the fruit.  Make sure to do this over a bowl, catching the extra juice that will be used along with the kiwi.


Combine the figs, water, and sugar in a medium sized stock pot.  Bring mixture to a boil over medium heat.

 
Cover pot and reduce heat to low and continue to simmer until figs begin to soften, about 10 minutes. Stir often so the mixture won't burn.
 

Remove lid and add the chopped kiwi and extra juice, stir to combine.  Continue to simmer, uncovered about 5 minutes, stirring often.


Add the chopped walnuts and sesame seeds; stir to combine.  Cover lid with pot and simmer for 30 minutes, stirring often to avoid the jam sticking to the bottom. 

 
Remove lid and cook for an additional 10 minutes or until all moisture has evaporated and mixture is thick.


Remove jam from heat and allow to cool.  Store in an airlight container in the refigerator for up to two weeks.

To serve, brush sliced baguette with olive oil and toast on grill. 


Combine about a quarter of a cup of mascarpone with a tablespoon of honey, stir to combine.


Slather the sweetened mascarpone over the toasted baguette and top with a dollop of jam.  Serve immediately.


Jul 2, 2014

Caramel, Coconut, & Sea Salt Oatmeal Cookies

 
The idea for these cookies came from summer desperation and a means to help keep my kid busy in the kitchen.  However, I was literally almost out of flour (why I used oats) and had EXACTLY 3/4 of a cup of butter left.  No chocolate chips neitha.  All I had was half a bag of caramels and some coconut.  These truly were everything-but-the-kitchen-sink cookies.  But damn after we tasted them it was as if this recipe was conceived by the heavenly cookie Gods to be a legend.  Yes, a legend people.  I always know I've got something good when my husband says 'this would sell.'  So if you've got a bake sale coming up, these pups are your go-to money maker. 


Caramel, Coconut, & Sea Salt Oatmeal Cookies

Ingredients:
1 3/4 cups all-purpose flour
1 1/2 cups rolled oats
1 1/2 cups brown sugar
1/2 teaspoon baking soda
1/2 teaspoon salt
3/4 cup unsalted butter, melted (and slightly cooled)
2 eggs, room temperature*
1 egg yolk, room temperature*
1 tablespoon vanilla extract
1 cup sweetened coconut flakes
1 cup Kraft Caramel Bits
sea salt

*I never-ever remember to leave my eggs out when a recipe calls for room temp. eggs.  Don't worry it's an easy fix.  Put eggs in a large bowl and place in the sink.  Fill bowl with warmish (but not hot) water and let the eggs sit for a few minutes until they warm up.

Directions

Preheat oven to 350 degrees F.  Line cookie sheet with slip mat or baking paper.  Sift the flour into a large bowl.  Add the oats, brown sugar, baking soda, and salt.  Using a wooden spoon, stir well to combine.

 
Combine the two whole eggs and one egg yolk in a small bowl and slightly whisk to combine.  In a medium sized bowl, combine the melted butter, eggs, and vanilla.  Stir to combine.

 
Pour wet mixture over the dry and mix to combine.

 
Add the coconut and caramel bits and mix well to combine.
 
 
Roll dough into balls and slightly flatted with your finger tips.  You can use the back of a fork to make a criss-cross pattern if you wish.  I did this but it wasn't very prominent after they baked.  Sprinkle each cookie with sea salt.
 
 
Bake for 10-12 minutes or until edges are slightly golden.  Some of the caramel may ooze out the side like this one.  Its easy to break off once they're cool (and super yum too).

 
Let cookies cool on pan for a few minutes, then transfer to a wire rack to cool completely.  Store in an air-tight container for up to a week.


Jun 29, 2014

Banoffee Pie in a Sour Cream Pastry Crust with Espresso Whipped Cream


I'm not sure what mountain of buttercream I've been hiding under for the majority of my life, but how I've never come to make Banoffee Pie before is just ludicrous.

Ok, America...you too. Let's be honest. I didn't even know about Banoffee until I moved to Dubai...it's almost a bit embarrassing to admit really. Ok to be fair, it is a traditional classic British pie, so it's not our fault. But how-oh-how is this not part of our Thanksgiving lineup, snug and chummy next to the Apple and Pumpkin? Because get ready for this...Banoffee is better than BOTH! AND it's cheaper, the filling only has three ingredients! One of which is sweetened condensed milk, so you know it has to be good.

Never mind...we learn and move on.  Banoffee...it's simple.  Banana + Toffee.  I know, right?  I didn't know what it meant at first either.  Kind of looks like a typo when you first read it.

So let's talk about this sour cream crust.  Hello new BFF.  Is that abbreviation over with yet?  What can I substitute for it?  It's just easy and sums up so much.  Anyway, this crust is soooooo forgiving.  It almost rolls itself AND jumps in your pie plate, you will love it.  I found the recipe on Mel's Kitchen Cafe, lovingly goes into detail about every step.  I suggest you go over to her page and read all about the crust.  No food processor required.  Yay, one less thing to dig out/wash/put away.


Banoffee Pie in a Sour Cream Pastry Crust with Espresso Whipped Cream
makes one single 9-inch pie crust
printable version

Ingredients

For the Crust:
1 1/2 cups unbleached all-purpose flour
1/4 teaspoon salt
2 teaspoons granulated sugar
1/2 teaspoon cinnamon
10 tablespoons butter, frozen
1/2 cup full-fat sour cream, plus an additional tablespoon or two if needed
 
For the Filling:
3 1/2 tablespoons unsalted butter, cut into cubes
1/3 cup brown sugar
1 can sweetened condensed milk
 
For the Espresso Whipped Cream:
3/4 cup heavy whipping cream
1 teaspoon vanilla extract
3 tablespoons sugar
3/4 teaspoon instant espresso powder (not instant coffee granules)
 
Directions

Whisk together the flour, salt, sugar, and cinnamon in a medium sized bowl.
 
 
Using a large cheese grater, grate the butter into the dry ingredients.  I wrapped a piece of plastic wrap around the bottom of the cold butter to help it from slipping out of my hand (take care not to grate it like I did...)

 
Use a fork to lightly coat the butter with the dry ingredients.  Don't mush the butter down, you want to keep lots of chunky pieces to help to create a flaky crust.


Add the sour cream and use fork to incorporate into the butter and flour mixture.  Don't over mix, otherwise the dough will become too tough. 

 
The dough will be slightly shaggy (as Mel perfectly describes it).  At this point, it's best to work it together with your hands.  But don't over-do it.  Just shape it into a cohesive ball.  Kneading too much will result in a tough dough.
 
If you find your dough is too dry, add one small spoonful of sour cream at a time until it comes together (pressing down with the fork after each addition...I had to add about two extra spoonfuls)

 
If baking immediately, the dough is ready to be rolled out (no extra refrigeration time required, I know it's awesome).  If you'll be baking it later on, shape the dough into a disc, cover with plastic wrap and refrigerate 1-2 days.
 
Roll out the dough on a lightly floured surface, making sure to also dust your rolling pin.  Start from the center and roll outward, rotating the dough a quarter-turn after a few rolls with the pin.  Work the dough as little as possible to ensure a flaky crust.

 
I usually place my pie plate over my rolled dough to ensure large enough for my plate; also check to see if there is enough dough around the perimeter to fit up the sides of the plate.

 
Carefully roll the dough onto the rolling pin (dust with flour before hand) and un-roll onto the pie plate. 


Using kitchen shears, trim the excess dough around the perimeter of the pie, leaving about 1/4 inch.

 
Fold the cut overhang underneath and crimp the sides of the dough all around the pie.


Cover pie with plastic wrap and refrigerate for 30 minutes before baking.  Preheat oven to 350 degrees F.  Remove pie from fridge and cover with baking paper.  Fill with dried beans or pie weights.  Bake for 20-25 minutes.  Remove from oven and carefully remove the weights or beans and discard paper.  Place back in the oven for 10-12 minutes, until golden.

 
Let crust cool completely on wire rack before filling.
 
 
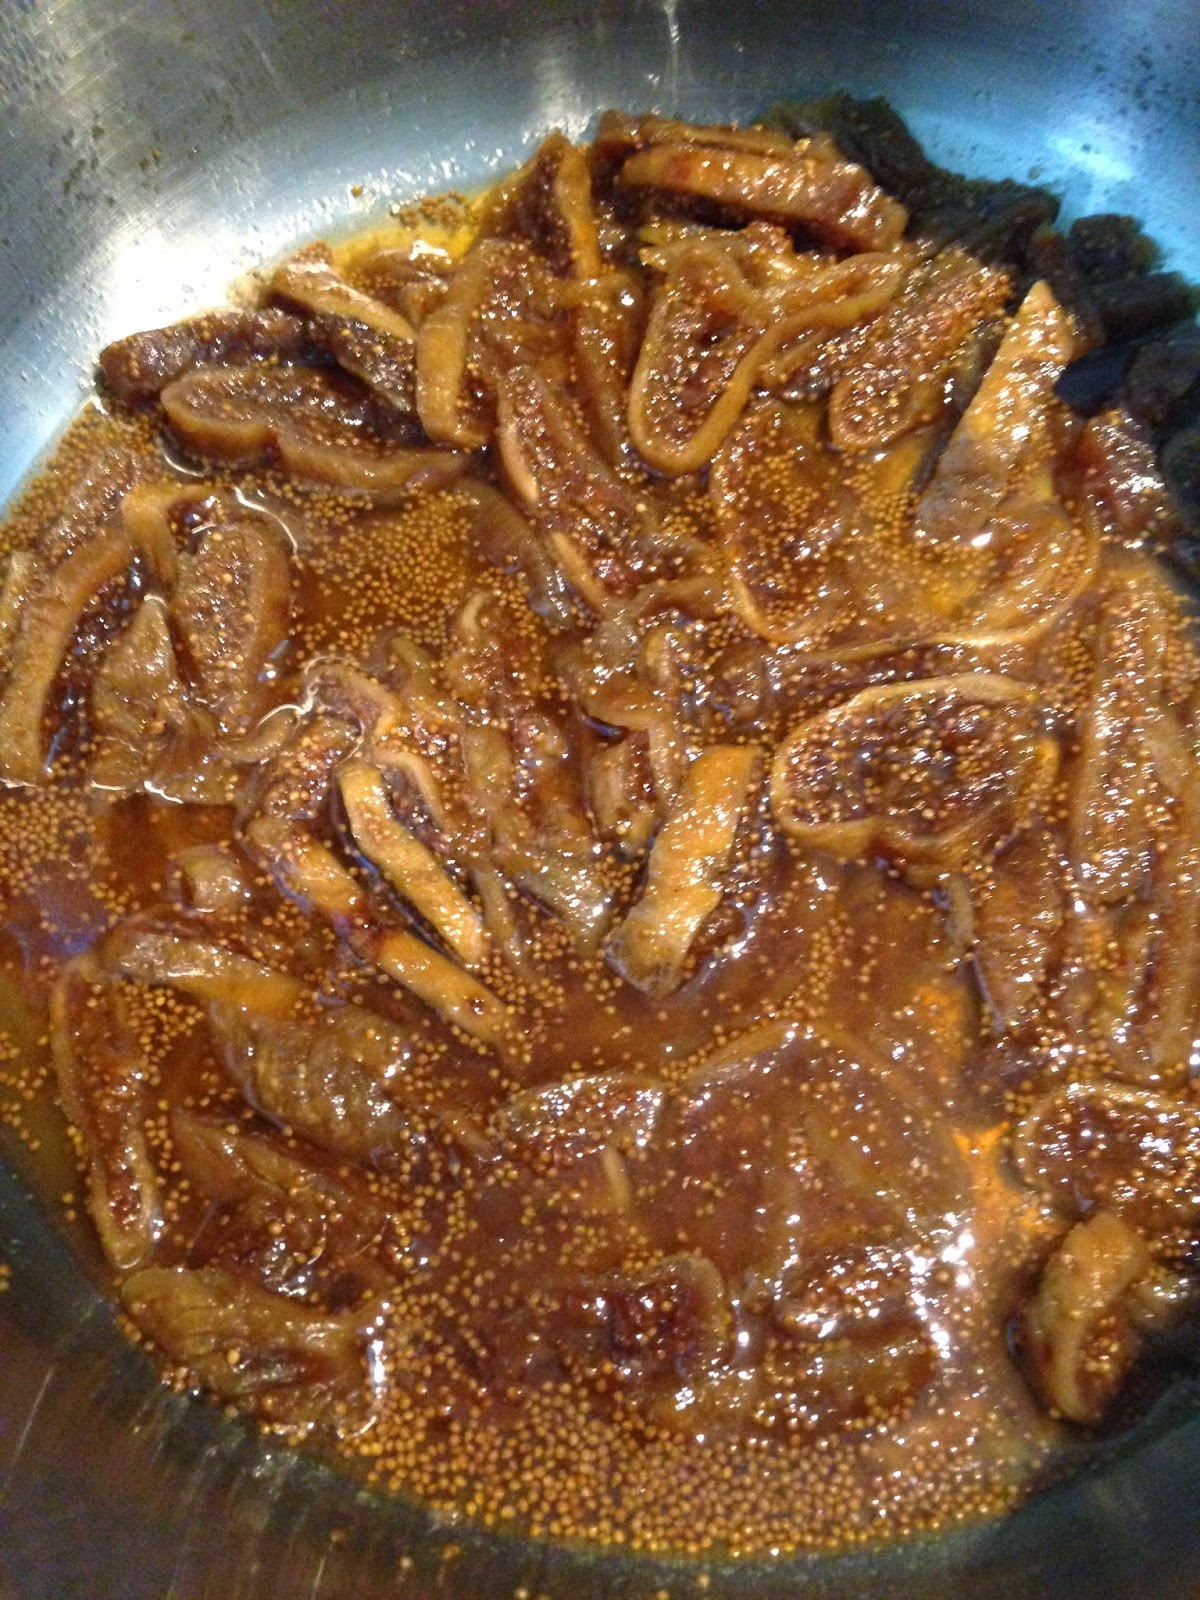
To prepare the filling, combine the butter, sugar, and sweetened condensed milk in a saucepan.  Over low heat, bring mixture to a slow simmer, but do not boil.  Cook for 10-12 minutes or until mixture thickens.


Immediately pour the thickened filling into the cooled pie crust.  Smooth evenly with a spatula.  Refrigerate until firm, about 2 hours, or until ready to serve.


Once ready to serve, slice bananas and place in a large bowl.  Add the lemon juice and gently stir to coat the bananas. 
 
 
Arrange the sliced bananas in two over-lapping circles around the pie.  I like to leave a gap between the crust and the bananas so the filling shows nicely.
 
 
To prepare the whipped cream, beat the heavy cream on high speed until soft peaks form.  Add the sugar, vanilla, and espresso powder and beat again on high until the mixture becomes thick.


Add a large mound of the whipped in the center of the pie on top of the bananas (but not covering them completely!) dust with cocoa powder and serve immediately.


crust recipe adapted from Mel's Kitchen Cafe
 
pie filling courtesy of Taste