
Happy 100th to me! Phew, I'm beat...and a bit chubbier too (well to give myself some credit I've had two kids since I've started this blog so I'm claiming baby-weight...for now). And after all this baking, man have I accumulated a serious collection of baking equipment...and useless sprinkles...and cake frosting tips that I have no idea do what....and pie weights that I've never used...oh and two rolling pins...you know in case you need one for each hand.

And the absolute best part about my 100th post is I get to share my son's 3rd birthday cake. He's my champ, my beloved taste-tester, and the reason I get up every morning...at 6am that is...and well, sometimes 5am too.

Now, if you're a follower of the blog, you may have noticed that I am NOT a 'let's make a cake shaped like a purse or Disney character' kind of girl. No, I like my food to taste what it looks like. Not that I'm knockin cake decorating, fondant design/sculpture, or sugar craft. The artisans who can create cakes that look like shoes are no doubt in a league of their own, one that I could never be drafted into. I'm an old school baker. I like to swirl my frosting and end it there. Just means you get to cut the cake that much faster.
However, with that said. I still do have a 3 year old. And although I'm pretty sure he'd be happy with any cake I'd put in front of him so long as it had a candle smushed in it, it was still his third birthday. And since 3 is a pretty big deal, I figured he deserved a cake worthy of his awesomeness.

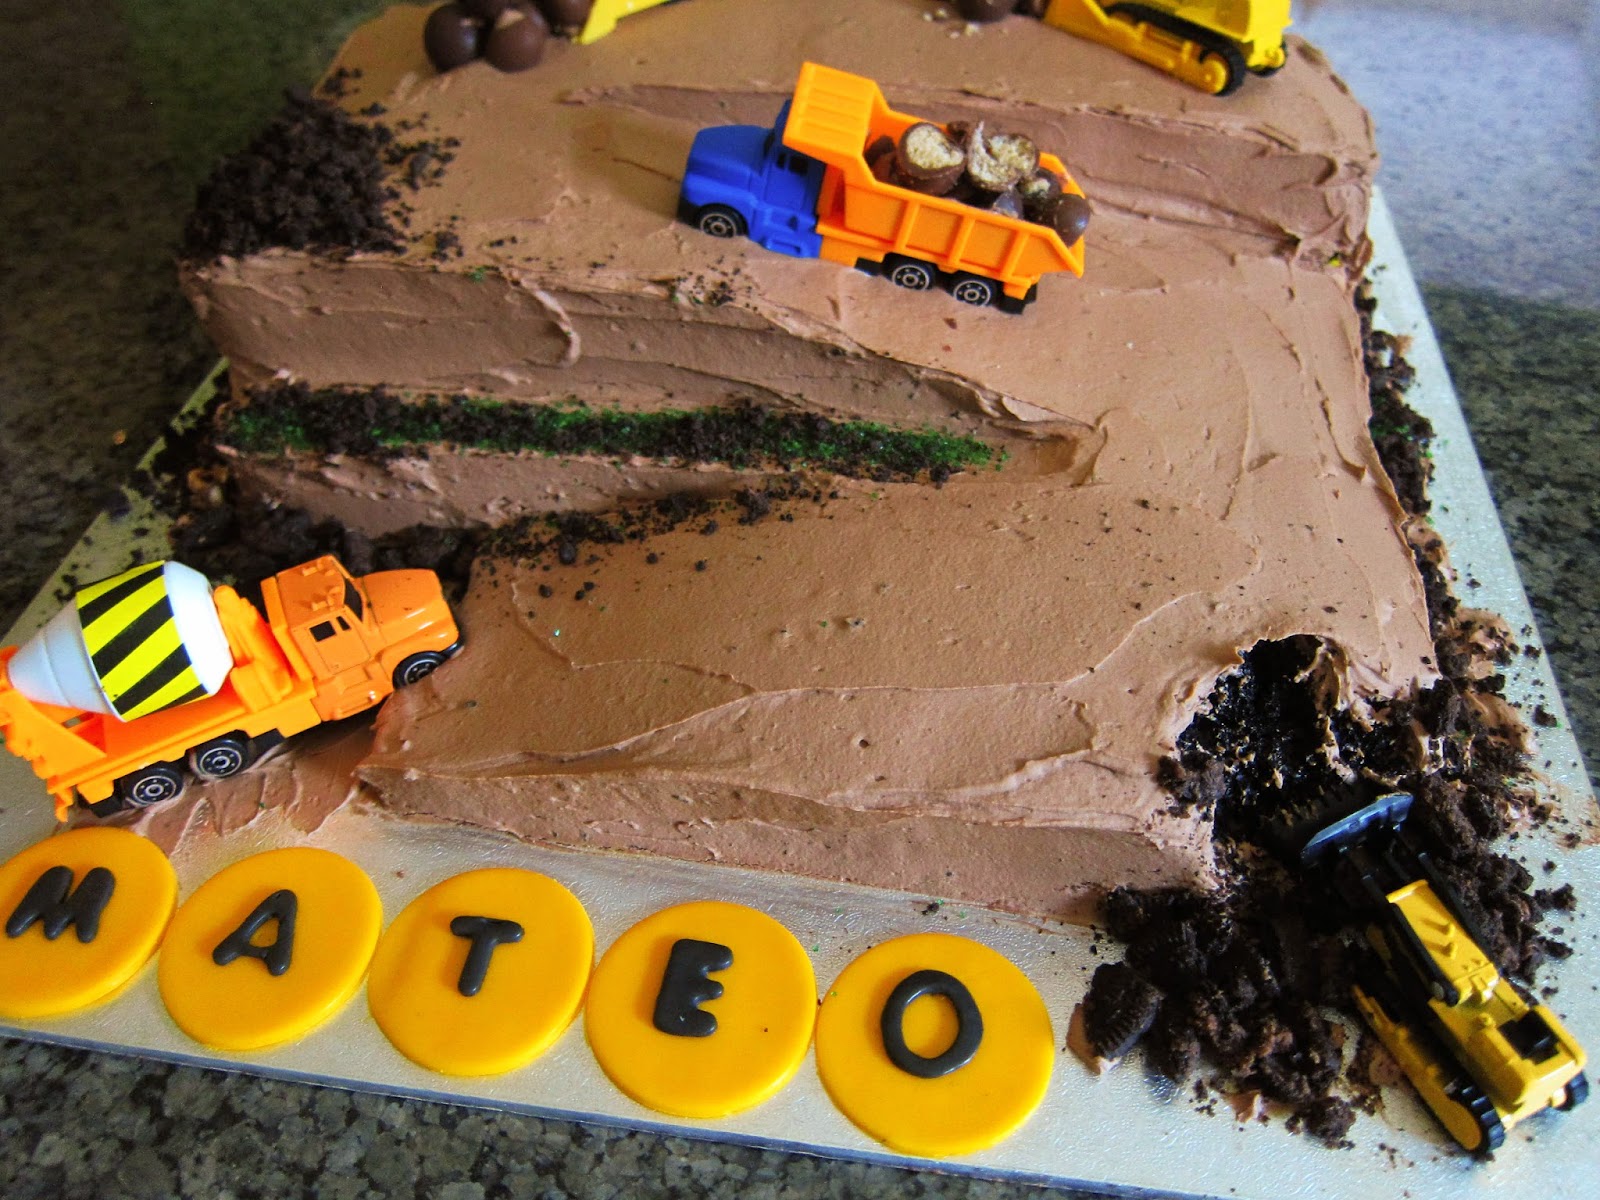
And since my cake decorating skills are not expert level 5...a dirt cake seemed do-able. And the best part? If you've got a corner that looks iffy, just plow it over, crumble some Oreo's on top and stick a truck next to it. Boom, looks like you did that on purpose. Yeh this was my kind of cake...one that is forgivable.
Here's what you'll need:
Two 9x13 chocolate cakes
Half a batch of Marshmallow Butter Cream Frosting
Chocolate Buttercream
Oreo crumbles (I used about 10-12 cookies)
Chocolate covered nuts/fruit (that look like boulders/rocks)
3-5 toy trucks
Fondant (if you want to add your child's name) including yellow and black gel food coloring
Getting Started:
First, bake and cool both of your cakes. These can be made a couple of days ahead of time. Simply cool the cake, wrap tightly in plastic wrap and tin foil and refrigerate until ready to assemble. Actually, I would recommend refrigerating the cakes even if baking them the same day you are planning to assemble the cake. When chilled, they're easier to frost.
Assembly:
As you can see in the photo below I have one entire 9x13 cake in the background. I cut up the second cake to make the ramps and raised levels.
I suggest you stack your upper layer and upper ramp prior to frosting the middle layer (the yellow buttercream) so you can eyeball it's location. I had a photo of this but it was terribly blurry...sorry. Once you have the second layer and upper ramp in its temporary position, frost around the front of it with the chocolate buttercream (as shown below).
Remove the upper layer and upper ramp and frost the section behind the chocolate frosting you just placed with the yellow buttercream.

Now you can place the upper layer and Ramp 2 back in it's place permanently:

Crumb coat this beast like there is no tomorrow. Black Joe Cake is super soft and moist, and crumbs like crazy. It's okay, the crumbs will show in the crumb layer, but that is the point! Now refrigerate until the crumb layer is slightly firm, about 30 minutes.

Cover entire cake with another layer of frosting. Not going to lie, I swirled and swirled and swirled some more. All those corners can drive you mad. I remember once watching Martha Stewart frost a cake. You know she's Ultimate Mrs. Perfection, right? She kept swirling and spinning the cake around and finally said 'at some point you must just stop.' And she's right. It's almost impossible to perfect this with buttercream. Just try to get it as smooth and even as possible. If you have a corner you're just not happy with, don't worry. Look what happens next.....

Oreo crumbs fix everything! I found the best way to pull off the corners to make them look 'under construction' was to take a fork and gently pull at the cake. Remove the cake you scrapped and cover with Oreo crumbles. You can't screw this part up. The messier it gets, the more realistic it looks. And what kid doesn't want a mess for his birthday?

I also sprinkled green dusting sugar around the edges to have the appearance of grass. If I were to do this again, I might instead dye flaked coconut green for a more realistic look.
Don't forget to fill your little dump trucks with candy that look like 'boulders'. We chopped some into pieces to look even more messy. Did I mention my husband helped me with the whole cake? Besides the engineering (ramps) he was in charge of making our sons name out of the fondant including coloring it with the yellow and black food coloring gel, rolling/cutting out the circles and letters. He was in man heaven.


Recipes
Black Joe Cake (you will need two for the construction cake; the recipe below is for one 9 x 13 cake)
Ingredients:
2 cups all-purpose flour
1 3/4 cups granulated sugar
2 teaspoons baking soda
1 teaspoon baking powder
3/4 cup cocoa powder, sifted
1 teaspoon salt
1 cup sour cream (remove from fridge about 20 minutes prior to baking)
1/2 cup canola oil
2 eggs
2 teaspoons vanilla extract
1 cup strong, brewed coffee (cooled to room temperature
Directions:
Preheat oven to 350 degrees Fahrenheit. Grease and flour a 9x13 cake pan. Set aside.
Sift together the flour, sugar, baking soda, baking powder, cocoa, and salt. Whisk to combine.
In the bowl of a stand up mixer (or using a hand mixer) combine the sour cream, oil, eggs, vanilla, and coffee. Beat on medium until well combined.
Add the dry ingredients to the wet in 3 additions, beating well and scraping down the sides of the bowl after each addition.
Pour batter into prepared pan and bake for 40 minutes. Remove from oven and place pan on a wire rack to cool for 15 minutes. Run a butter knife around the edges of the cake and place plate on top of pan and invert. The cake SHOULD come out...if it doesn't slightly tap on the bottom of the pan with your knuckles while inverted. If it still doesn't come out, invert back and run a knife around the edges again, making sure all sides are loose.
Once removed from pan, allow cake to cool completely on a wire rack. Wrap first with plastic wrap and then aluminum foil and refrigerate until ready to assemble.
Marshmallow Buttercream (you will only need about half to 3/4 of this frosting for the Construction Cake. The remainder can be refrigerated for up to a week, or frozen for 2 months)
Ingredients:
8 ounces unsalted butter, room temperature
1 (7 ounce) jar Marshmallow Creme
2 cups powdered sugar, sifted
1 teaspoon vanilla extract
Directions:
Cream butter until it's light and fluffy, about 3-4 minutes. Add the marshmallow creme and beat until well combined, about 2 minutes. Add powdered sugar and beat for another 2 minutes. Add vanilla extract and beat until combined.
Chocolate Buttercream
Ingredients:
1 pound unsalted butter, room temperature
3 tablespoons milk
12 ounces semisweet chocolate, melted and cooled to lukewarm
1 1/2 teaspoons vanilla extract
3 cups powdered sugar, sifted
Directions:
In the bowl of a stand up mixer (or hand mixer using a large bowl) beat the butter until creamy, about 3 minutes. Add the milk and carefully beat until smooth. Add the melted chocolate and beat well, about 2 minutes. Add the vanilla and beat for 3 minutes. Gradually add the sugar and beat on low until creamy.

cake concept from virgie and hats
Marshmallow Buttercream courtesy of Baked Bree
Chocolate Buttercream courtesy of More from Magnolia: Recipes from the World-Famous bakery and Allysa Torey's Home Kitchen