Mar 6, 2013

Spiced Pineapple & Carrot Cake & Almond Infused Mascarpone & Berry Tart


My latest beauties were prepared for Aveem Foods for the 'Aveem Challenge,' a competition for food bloggers here in the UAE.  You may recall the Frozen Fudgy Caramel Extreme Trifle I also submitted for the competition.  Aveem was extremely generous and sent us over loads of goodies including white and brown sugar, their endless spice collection (including nutmeg that was the most intense in color and taste that I've ever baked with, a total dream) along with an assortment of House of Tudor teas, AND to top it off, a bottle of Jose Galan olive oil (ideal for dipping with crusty bread as it has a heavenly, fruity bite), all of which will soon be hitting the grocery shelves here in the UAE, will keep you updated!
 
Aveem asked if I could incorporate their logo somehow onto the desserts as they wanted to present them to Ahlan & Ahlan Gourmet as a introduction to the quality of their products.  This was a bit of a challenge in itself for me as cake decorating is not exactly my forte...up until now I've only been able to make things taste good, but looking good is still something I'm trying to conquer.
 
Nonetheless, my husband (and hero) helped to make a template using card stock printed with Aveem's logo for the top of the carrot cake.  We stood in the kitchen like two kids working on a science experiment trying to nail down the logo in sprinkles.  By the way I think I will be finding those little metallic balls EVERYWHERE throughout the house for months to come.  Fingers crossed the images will be showcased in Ahlan & Ahlan Gourmet shortly, will keep you posted. 
 
In the mean time, please trust me on this one.  If you want to taste the best carrot cake of your life, try this recipe.  I have a stained, ripped, and dripped on printed copy that dates back to 2004.  This is THE go-to carrot cake. I think what makes it so special is the addition of the pineapple.  It adds such fruity, unexpected texture.  And let's not forget the ridiculous amount of spices that go into this cake.  Each note adds another dimension of flavor, yet they blend together effortlessly.  And whatever you do, remember to toast your walnuts before adding.  Toasting nuts increases the intensity of their inherent flavor, a very important step for this recipe.
 
Now let me tell you about the mascarpone tart.  Talk about luxury in a 9 x 9 pan.  I was totally shocked after I whipped up the mascarpone and cream...it's smooth, creamy, thick, and melts like cotton candy on your tongue.  It's a foolproof filling that's literally a blank canvas.  I added almond extract and Frangelico, but really the sky is the limit here.  You could try adding a scrapped vanilla bean, diluted instant coffee, lemon extract, maple extract, literally any flavored liquor you have on hand, or simply stick to plain sugar for a hint of sweetness. 
 
Spiced Pineapple & Carrot Cake 
makes one 2-layer 8" round cake
 
Ingredients
 
For the Cake:
6 cups grated carrots (about 7-8 large carrots)
1 cup brown sugar
1 cup raisins
3 tablespoons dark rum
1 tablespoon Cointreau (or Grand Marnier)
4 large eggs
1 1/2 cups sugar
1/2 cup vegetable oil
1/2 cup applesauce
2 teaspoons vanilla extract
1 cup crushed or chopped canned  pineapple ***reserve juice
3 cups all-purpose flour
1 1/2 teaspoons baking soda
1 teaspoon salt
5 teaspoons cinnamon
1/4 teaspoon nutmeg
1/4 teaspoon ginger
1/4 teaspoon cloves
zest of 1 lemon
1 cup toasted walnuts, chopped
 
For the Cream Cheese Frosting:
8 ounces cream cheese, softened
1/4 cup butter, softened
1 teaspoon vanilla extract
4 cups (16 ounces) powdered sugar
zest of 1 lemon
 
Directions
 
In a medium bowl, combine grated carrots and brown sugar.  Set aside for 1 hour, stirring halfway through. 


After an hour, you will notice there is quite a bit of moisture in the bottom of your bowl.  Be sure to drain this out.  No need to strain, just push your spoon against the carrots and let the fluid flow into the sink.  A little bit left over in the bowl is okay.


Strain the canned pineapple, reserving the juice.  If the pineapple is quite chunky, give it a quick chop so you're left with bite-sized pieces.
 
 
Pour the strained juice into a measuring cup.  

 
Add water to the measuring cup until it's equal to 1 cup.  Add the rum and Cointreau, stir to combine.
 
 
Add the liquid and raisins to a small saucepan and bring to a boil.  Reduce heat and simmer for about 15 minutes, stirring occasionally.  Remove from heat, strain juice (discard) and set raisins aside.

 
Preheat oven to 350 degrees Fahrenheit.  Grease two 8-inch round baking pans.  I use a plastic sandwich baggie as a glove to make this step easy.  Line bottom of pans with parchment circles and grease.

 
Dust with flour and knock out excess, set aside.

 
In the bowl of an electric mixer, beat eggs until light.


Meanwhile, Mateo is busy building a spice castle with the boxes sent over from Aveem...

 
Gradually beat in the white sugar.

 
Beat in the oil, applesauce, and vanilla.


Stir in the pineapple.

 
In a separate bowl, sift the flour, baking soda, salt, cinnamon, nutmeg, ginger, and cloves.

 
Add the lemon zest and whisk to combine.

 
Stir the dry ingredients into the wet in 3 additions, just until absorbed.


Add the carrots, raisins, and toasted walnuts to the batter, mix to combine.
 

Pour evenly into the prepared pans and bake for 45-50 minutes until a toothpick inserted into the middle comes out clean.  Transfer pans to a wire rack to cool for 10 minutes.  Remove from pan and return to wire rack to cool completely.


To prepare the cream cheese frosting, beat cream cheese and butter until incorporated, about 1 minute.


Add the vanilla and lemon zest. Beat to combine.
 
 
Before adding the sugar, be sure to sift it first into a separate bowl:

 
Otherwise clumps like these can make your frosting lumpy, who likes that?


Add powdered sugar to the creamed mixture 1 cup at a time.

 
Be sure to scrape down the sides of the bowl before each addition.

 
To assemble the cake, place a disposable cake board on top of your serving platter (I'm using Wilton's Trim & Turn Cake Turntable, which makes frosting the cake a breeze).  The cake boards help to transfer the cake from serving platter to cake server.  


Frost the first layer with about 1 1/4 cups frosting using an offset spatula.


Top with second cake layer and apply an even crumb coat to the entire cake.  A crumb coat is a thin layer of frosting that seals in all the tiny crumbs so the final layer of frosting is smooth and cake-free.
 
Place the cake in the fridge for the crumb layer to firm up, about 30 minutes.


Finish the cake with the remaining frosting and decorate with sprinkles or chopped nuts.  
 
Slice up and enjoy!  Be sure to keep a look out for Aveem sugars and spice collection that will be hitting our stores soon.
 
 
cake recipe adapted from allrecipes.com
frosting recipe courtesy of Philadelphia
 
 
Almond Infused Mascarpone & Berry Tart
makes two 8 or 9 inch tarts
 
Ingredients
 
For the Pate Sucree (sweet pastry): *note: this pastry dough recipe makes enough for 2 tarts
2 1/2 cups all-purpose flour
1/4 cup sugar
1/4 teaspoon salt
1 cup (8 ounces) cold, unsalted butter cut into small cubes
2 large egg yolks, slightly beaten
2-4 tablespoons cold heavy cream or ice water
 
For the Mascarpone Filling:
1 cup (8 ounces) maascarpone cheese
1/3 cup chilled heavy cream
1/4 cup sugar
1/2 teaspoon almond extract
1 tablespoon Frangelico
zest of 1 lemon
 
For the Apricot Glaze:
1/2 cup apricot jam
2 tablespoons Frangelico
 
3 cups mixed berries (strawberry, blackberry, blueberries, raspberries...really whatever is in season)
 
Directions 

 
To prepare the pastry, combine flour, sugar, and salt in the bowl of a food processor.


Add butter, and process until mixture resembles coarse meal, 10 to 20 seconds.


Add yolks and drizzle the 2 tablespoons of chilled cream or water evenly over the mixture; pulse until dough begins to come together, no more than 30 seconds. If dough is too dry, add remaining cream or water, 1 tablespoon at a time and pulse.


Divide dough in half, wrap tightly in plastic wrap. Refrigerate 1 hour or up to 2 days.


Preheat oven to 375 degrees Farenheit.  On a lightly floured surface, roll out dough to 1/8" thick.


Wrap the dough around the rolling pin, lightly dusting the flour so it won't stick.  Make sure your tart pan is close by so you can gently transfer the dough.
 
 
Trim the dough flush with the pan.  Pierce the bottom of the pan all over with a fork.  Refrigerate or freeze until firm, about 30 minutes.

 
Remove from fridge and line tart with parchment paper and fill with pie weights or dried beans.  Bake until the edges are golden, about 15 minutes.  Remove the beans and paper, continue baking until crust is golden brown all over, about 10 minutes.  Let cool completely on a wire rack.
 
 
To prepare the glaze, combine the apricot jam and Frangelico in a small saucepan.  Heat until the jam liquifies.  Stir to combine.
 
 
Pass the jam mixture through a fine sieve to remove the fruit pieces.


Using a pastry brush, apply a thin coat of the apricot mixture to the bottom of the baked tart shell.  This will help to keep the crust from not becoming soggy after adding the mascarpone.


To prepare the mascarpone filling, combine mascarpone, cream, sugar, almond extract, Frangelico, and lemon zest in the bowl of a stand up mixer.  Beat with whisk attachment until stiff peaks form.


Transfer the mascarpone mixture  to the tart shell and spread evenly.


Top with the assortment of berries.  I laid them flat as shown here, but feel free to also pile them up.

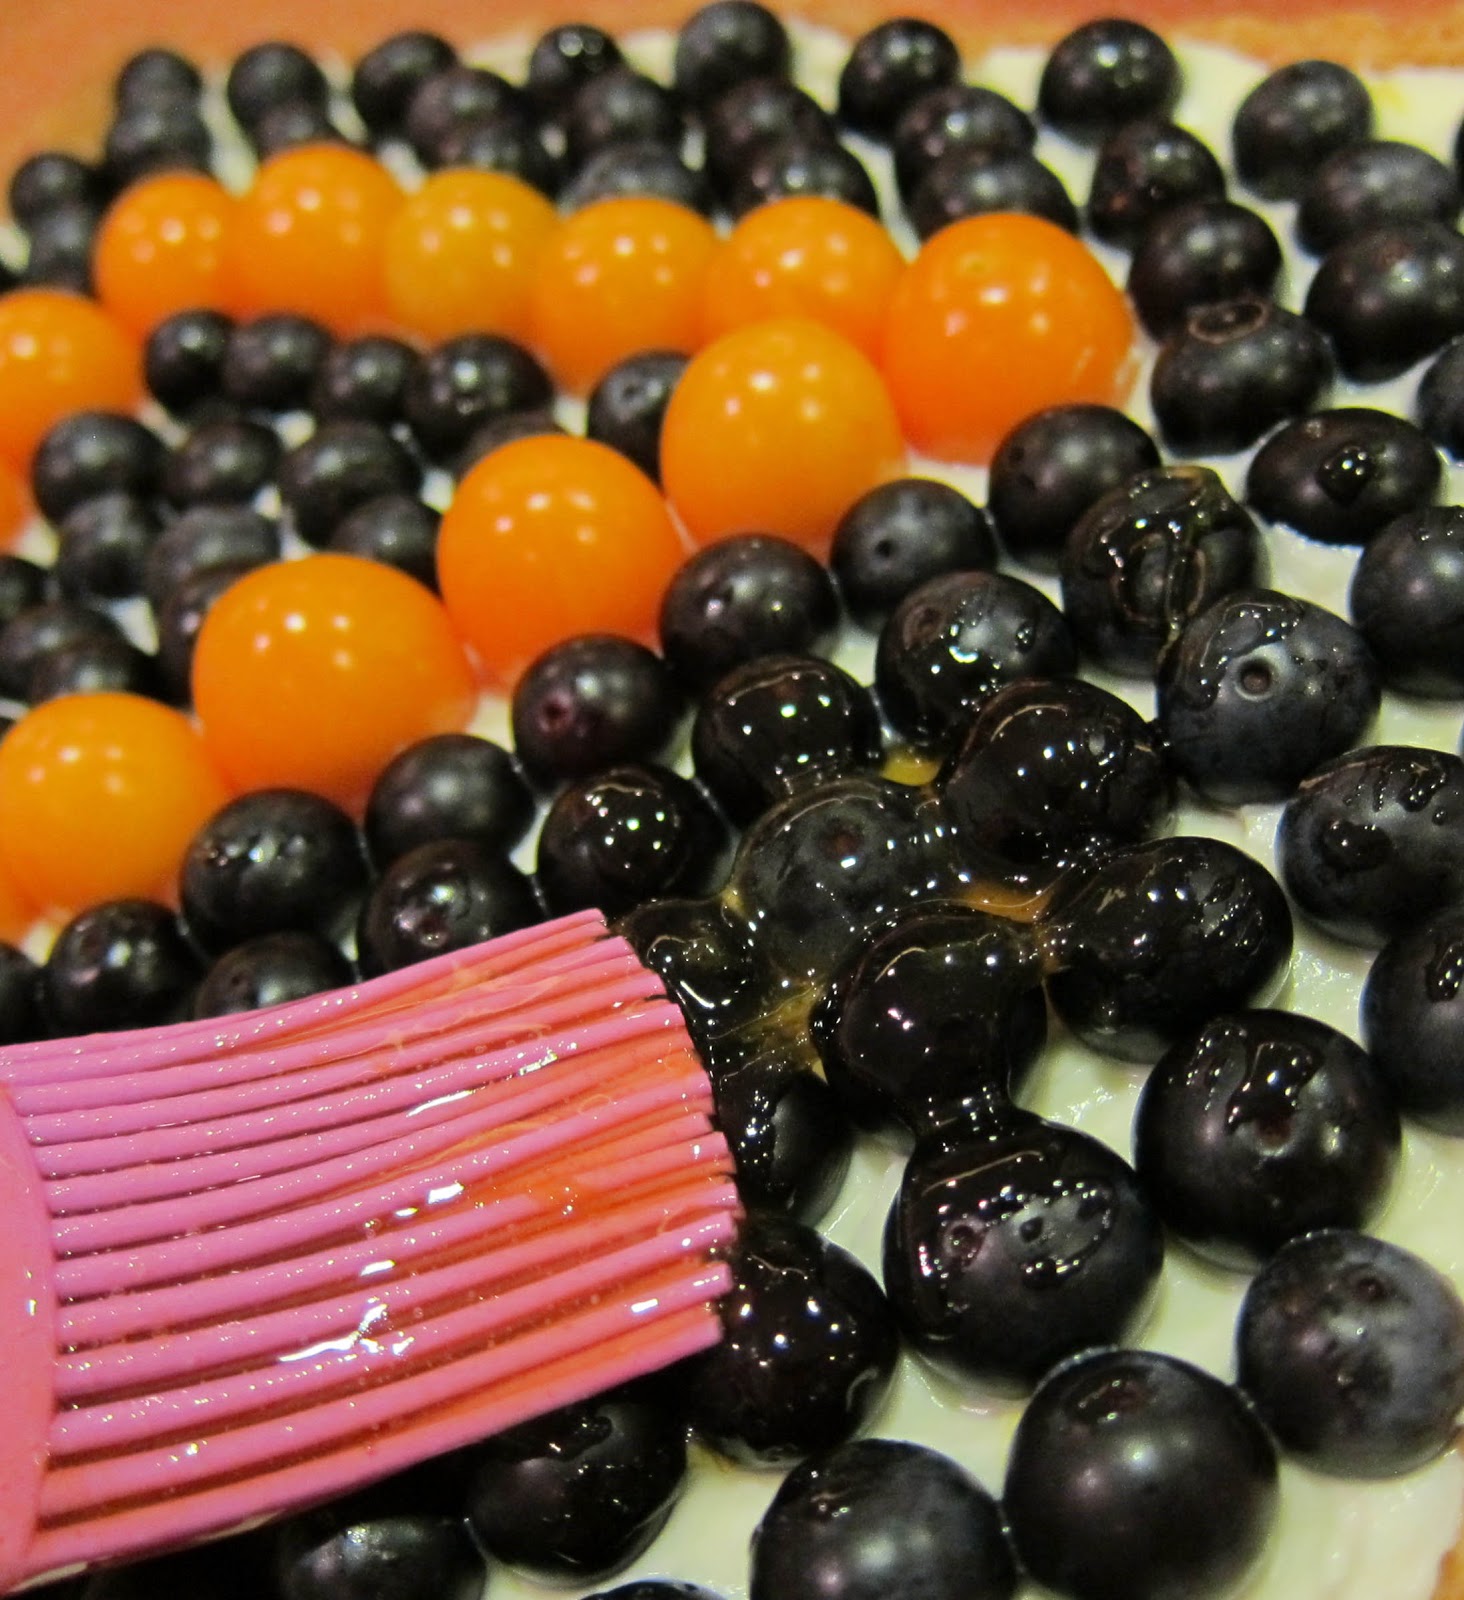
Using a pastry brush, gently coat the berries with the remaining glaze.  This will help keep them fresh and looking shiny and delicious.
 
 
Enjoy!
 
 
pate sucree recipe courtesy of Martha Stewart's New Pies & Tarts
 
mascarpone filling recipe adapted from Epicurious
 
glaze recipe adapted from Joy of Baking
 

Feb 6, 2013

Red Velvet Cake with Cinnamon Buttercream


Not gonna lie, I'm not a huge fan of Red Velvet Cake.  In fact, I think this is the first one I've ever made.  Not because they are complicated but I just never understood the concept.  It's a white cake dyed red.  Okay there is a little cocoa added, but that's only to increase the intensity of the red color...so basically we're talking about a mild mild mild chocolate cake with a red spray-tan.

Yeah I know I'm not giving you much incentive here...but let's face it, it's pretty at least.  And it's red and almost Valentine's Day, and people LOVE Red Velvet this time of year.  So I'm sharing this recipe for all the romantics out there.

However, with that said, this is an excellent version of Red Velvet cake.  It's moist and spongy, yet still has some depth, texture wise.  But the crown jewel of this cake is the Cinnamon Buttercream.  I've never tried this combo before and I'm now wondering where has this concept been my whole adult baking life?  Can you image this buttercream on a carrot cake?  Wowza indeed.

The buttercream is extremely light and delicate, having almost a whipped quality.  I promise this is not the type of frosting that gets stuck to the roof of your mouth.  It is simply perfect, not overly sweet, and fool-proof, don't you love that?

Lastly, a word to the wise here, according to Baked, from whom I got the recipe from.  As much as you love Red Velvet Cake, try your best not to add more than the 2 tablespoons of red gel food coloring.  A red-tinged tongue is not something your Valentine is asking for this year...well, unless that is your thing of course.

Happy Velvet-y Valentine's Day.

Red Velvet Cake with Cinnamon Buttercream
makes one 3-tier 8-inch cake
printable version

Ingredients

For the cake:
1/4 cup dark unsweetened cocoa powder
2 tablespoons red gel food coloring
1/4 cup boiling water
6 tablespoons unsalted butter, softened, cut into small pieces
2 tablespoons vegetable shortening, at room temperature
1 2/3 cups sugar
3 large eggs
1 cup buttermilk
1 teaspoon pure vanilla extract
2 1/2 cups cake flour *see note below
1 teaspoon fine salt
1 tablespoon cider vinegar
1 teaspoon baking soda

For the cinnamon butter cream:
1 1/2 cups sugar
1/4 cup all-purpose flour
1 1/2 cups milk
1/4 cup heavy cream
1 1/2 cups (12 ounces) unsalted butter, soft but cool, cut into small pieces
1 teaspoon pure vanilla extract
2 teaspoons cinnamon

Red Hots (cinnamon imperials) candies for decoration, or any red-ish Valentine's candy.

Directions

Preheat oven to 325 degrees Fahrenheit.  Butter three 8-inch round cake pans, line the bottoms with parchment paper, and butter the parchment.  I use a sandwich baggie as a glove to make this step easier. 

 
Here's a tip to quickly cut parchment circles. Lay out a long piece of parchment that is long enough to fit your three pans, and trace each with a marker. 
 
 
Roughly cut out each circle. Align the 3 circles on top of each other (the dark marker helps to make the lines easier to see). Fold into quarters, and simply cut across the line. This helps so you're not sitting in your kitchen cutting around and around and around.


Dust the greased pans with flour, and knock out the excess.


In a medium bowl, whisk together the cocoa powder, food coloring, and boiling water.  Set aside to cool.

In the bowl of an electric mixer fitted with the paddle attachment, cream the butter and shortening until smooth. 


Scrape down the bowl and add the sugar.


Beat until the mixture is light and fluffy, about 5 minutes.  Add the eggs, one at a time, beating well after each addition.


 Stir the buttermilk and vanilla into the cooled cocoa mixture.


Sift the flour and salt together into another medium bowl.  With the mixer on low, add the flour mixture, alternating with the cocoa mixture, to the egg mixture in three separate additions, beginning and ending with the flour mixture.  Beat until incorporated.


In a small bowl, combine the vinegar and baking soda and stir until the baking soda dissolves; the mixture will fizz.  Add to the batter and stir until just combined.


Divide the batter among the prepared pans and smooth the tops.  You can see here I used Wilton's Bake Even Strips.  I've owned for about 4 years now and finally got around to using them.   You know I am all for useless kitchen gadgets but these work AMAZING!  First dampen the strips then pin them around the bottom edge of your pan.  The moisture helps ensure that the edge of the pan stays cooler which means you don't end up with rounded tops or dry edges.  No need to trim the tops off the cake once it's baked which means less wastage and pretty-lil-level tiers!


Bake until a toothpick inserted in the center of each cake comes out clean, about 30 minutes, rotating the pans halfway through the baking time.  Transfer the cakes to a wire rack and let cool for 20 minutes.  Invert the cakes onto the rack, remove the pans, and let cool completely.  Remove the parchment.


To prepare the cinnamon buttercream, whisk the sugar and flour together in a medium heavy bottomed saucepan. 

 
Add the milk and cream and cook over medium heat, whisking occasionally, until the mixture comes to a boil and has thickened, about 20 minutes.


Transfer the mixture to the bowl of an electric mixer fitted with the paddle attachment.  Beat on high until cool.  Reduce the speed to low and add the butter; beat until thoroughly incorporated. 

 
 Increase the speed to medium-high and beat until the frosting is light and fluffy.


Add the vanilla and cinnamon and continue mixing until combined. 

 
make sure your official taste tester is never too far away

If the frosting is too soft, transfer the bowl to the refrigerator to chill slightly, then beat again until it is the proper consistency.  If the frosting is too firm, place the bowl over a pot of simmering water and beat with a wooden spoon until it is the proper consistency.

To assemble the cake, place one cooled cake layer on a serving platter or revolving cake stand for easy decorating.  ***Note if your cake platter doesn't have a top, I suggest you buy a disposable cake board.  This way you can easily transfer the cake from the cake stand to a cake saver.  Trim the top to create a flat surface and evenly spread about 1 1/4 cups of frosting on top. 


Top with the next layer, trim and frost the top, then add the third layer. 

 
Crumb coat the cakes and put the cake in the refrigerator for 15 minutes to firm up the frosting.  A crumb coat is a very thin layer of frosting that is used to seal-in the crumb so the final coat of frosting will be smooth and crumb-free.


Frost the sides and top with the remaining frosting.  Garnish the cake with the red hots or whatever candy you can find that's red and sweet for your Valentine.  Refrigerate again for 15 minutes.


Slice up the love.  Enjoy!
 
Recipe courtesy of Baked: New Frontiers in Baking

Feb 2, 2013

Cinnamon Toast Crunch & White Chocolate Marshmallow Bars with Butterscotch Frosting


Ok, yes these are some-what glorified rice krispy treats, using cinnamon toast crunch instead of rice krispies.  I was hesitant, and I mean BEYOND hesitant to even post these bars.  I mean, come on...making rice krispy treats is not exactly rocket science.  And the intent of this blog is to push myself to learn how to bake like a pro, BUT...after tasting these there was no way I could keep the recipe to myself.  So think of this recipe as my day off. 
 
The inspiration to whip up these sugary-dense yet chewy squares of awesomeness was a bag of marshmallows that's been sitting in my pantry since Christmas.  Having a bag of marshmallows in the house is like money burning a hole in your pocket.  You must use them, the longer they sit there the more antsy I become.  I am the same way whenever there is large quantities of candy in the house.  Remember the Fluffernutter & Kit Kat Almost Fudge Bars?...same thing. 
 
So what the heck else can you do with large marshmallows besides s'mores or rice krispy treats?  I don't have a marshmallow gun and we're not camping folk so marshmallow bars it is.  I love using bullet-proof, corn-syrup-ie, preservative-gone-wild types of cereal for making marshmallow treats.  Rice Krispies are great, but you know been there, done that, WAY too many times.
 
I knew I wanted to use butterscotch chips for the frosting, so cinnamon toast crunch seemed like a perfect pairing.  You can swap out any cereal for these bars, and even switch up the butterscotch chips for chocolate or white chocolate.  These are pretty darn versatile.
 
And lastly, a head's up.  Find yourself a sturdy spoon to combine the marshmallows and cereal.  DO NOT, repeat DO NOT use a wooden spoon straight from the dishwasher.  The wood needs time to dry and the spoon is...well, vulnerable.
 
Can I just say I break wooden spoons on a monthly basis?  Thanks Mom for always keeping me stocked.


Cinnamon Toast Crunch & White Chocolate Marshmallow Bars with Butterscotch Frosting
makes 16 squares
printable version

Ingredients

For the bars:
2 tablespoons butter
1 bag (10 ounces) Jet-Puffed Marshmallows
4 heaping cups Cinnamon Toast Crunch cereal
1 cup white chocolate chips

For the butterscotch frosting:
1 cup sugar
3 tablespoons butter
1/3 cup milk
6 ounces butterscotch chips

Directions
Spray a 9 x 9 inch pan with non-stick cooking spray and set aside.

To prepare the bars, first spray a large stock pot and heavy-duty spoon with non-stick cooking spray.  Melt butter in pot over medium heat. 

Add marshmallows and stir until completely melted. 


Add cereal and gently stir to coat with the marshmallows.  Add chocolate chips and stir to combine.  Some will melt, that's okay.


Transfer mixture to the 9 x 9 prepared pan.  Using a piece of waxed paper, gently push cereal mixer into pan.  Be sure to compact well, otherwise when you cut into bars you will have gaps/holes.


Meanwhile, to prepare the frosting, combine the sugar, butter, and milk in a small saucepan.  Continue stirring until completely melted.  


Bring mixture to boil for 1 minute.


Remove from heat and stir in chocolate chips.  Continue stirring until smooth and all the chips have melted.


Pour mixture over bars and use an off-set spatula to spread evenly.

Transfer bars to the refrigerator for about an hour for the frosting to set. 

Cut into squares and enjoy!